Monday, June 30, 2014

A new perspective on journals

This past April I had a really fun day.  I drove about an hour to a scrapbook store to take a class from Heidi Swapp.  I really love her style and ideas so this was pretty much a bucket list worthy day for me - well, if I had a bucket list!  The class was simply great and she had some pretty cool ideas to share and also some new products (at the time) to let us play with.

 The class used her new mixed media kit as the base for the project along with items from both the Dreamy and Hello Today collection.  They do work so perfectly together!  We were making a journal!  I've always wanted to keep a journal but I think I'd rather end the day reading a book and escaping into another story than trying to relive mine, plus I'd probably get all Type A and add every last detail and miss the point of the exercise.  However, this was a new concept for me.  Heidi introduced the idea of journaling with prompts.  She had a list of sentence starters she had used and they were wonderful but I did end up taking things in a similar but different direction.


 This pretty little item now adorns my craft/office space.  We decorated this very VERY thick chipboard with the magic medium mixed with mint color shine.  I was introduced to Thickers stickers which I now love.  With a little stamping and some additional play time when I got home, I like the soft look of the book.

One request Heidi made was that we include a selfie on the first page of the book.  I had just taken this fun one with my pup and so I thought it would work well here atop this beautiful paper from the Dreamy collection.

This fun acrylic piece comes with the mixed media kit to which we added a sticker from the Hello Today collection.  You can see below another dotted acrylic banner that is also very cute!

And so we added page with paper and with photo pockets and continued to make the whole thing look very soft and pretty.  What I decided to do at home was to use the pretty lace cut paper and other epherma as the actual prompts for my journaling, which actually can just be a list or statement.  I date them and just add to it as I please.


For example, this beautiful tag with "hope" on it is a place to list out my hopes.  On the opposite page I used a stamp "big plans" and list out things I am looking forward to.


Some are just decorative cards with good sayings on them.  It's hard to see but I pulled this "10 things I love about you" sticker from the Vintage Chic collection and even (gulp) wrote down 10 things I love about myself.

I am in love with this concept.  I've already found that writing down a few things I want to accomplish has helped me actually do it.  I also know it will be a great place to find little memories about my life in that moment and to see just how quickly things can change.  There are few photos in this book, but lots of memories will fill the pages!

Monday, June 9, 2014

Tag Cards

I'm just not great at handmade cards.  Perhaps I have high expectations but I'll start and generally end up disappointed at the end result.  For Mother's Day this year, I really wanted to make my mom a card. I mean she loves anything I make for her...still...all these years later so how could I not win?  True, but I still wanted it to be cool and unique.  I was searching the web and pinterest when I came across this.  She called it a Pretty Large Tag Card and I just loved the idea!  So I ran with it.

And I love how it turned out.  I grabbed all kinds of pink papers and ephemera.  I also grabbed my pink and blush color shine and set to work.  I cut different tag shapes, added elements, and stamping.  Each piece has sentiment on it such as love, cherish, and celebrate. In the back I stitched a small piece of paper onto a tag on three sides allowing me to tuck a note inside.  This was quick and easy to make, super fun, and looks amazing.  I loved watching my mom look through it!

So being on a bit of "high" with my tag card, I wanted to try it again.  I have a few friends that I have really grown closer to and bonded with during the year. Not only that, but they are moms too and always have invaluable advice and support to offer.  I thought Mother's Day might be a great time to just say hey, thanks for being a great friend.  So I made a little gift of an emery board, nail polish, and some nail polish removal pads in these tiny buckets I found on the Target dollar rack and added a tag card to them!


Again, I hit up my stash for mostly pink items.  They are all similar but not the same.  I love how they turned out and it was just a great way to say thank you and enjoy your special day!

Saturday, June 7, 2014

RIGHT NOW memories

I'm very excited to share this quick and simple project that will help you document your memories quickly.  I make a point of saying that because I often hear from my friends "how do you find the time to do that!"  Well, not everything is a big project but it can be just as cute.  However, my main goal is always to record the memories - I just enjoy being creative and playing with pretty papers in the process!  This idea was inspired by this post.  I loved this new way of folding up a memory file.  While it was used as a gift-giving card in that project, I thought it would be a perfect way to quickly document my family members right now.  I used a memory file from the Mixed Company collection by Heidi Swapp.  I decorated it by stenciling with some color shine and magic medium.  I added ephemera and also the stickers from the memory file kit to indicate each person's section.  There are four of us in my family so this worked out easily.  I kept the cover simple and decorated it with the date - May 2014.  On the back side (after folding) I adhered a tab from the ephemera pack just to keep it all closed.  It's important to be generous in your folding so you have room to insert the journaling cards and photos.


 I used a 4x6 journaling card from the Heidi Swapp Hello Today collection and also some Project Life lined cards to capture my thoughts - those right in the moment thoughts.  I love looking back at the funny things my kids said or little things they were into.  For example, my youngest son has decided to call his pacifier a papi...not sure how he decided this but it's a fun little memory that will likely be forgotten as time passes.  Next, I printed some individual photos of everyone that highlighted the month and added those.  Ok, so how simple is that?  I really think anyone can find the time to do this small project to capture some great RIGHT NOW, right in the moment stuff to remember.

Thursday, June 5, 2014

Dreamy Memory File Kit

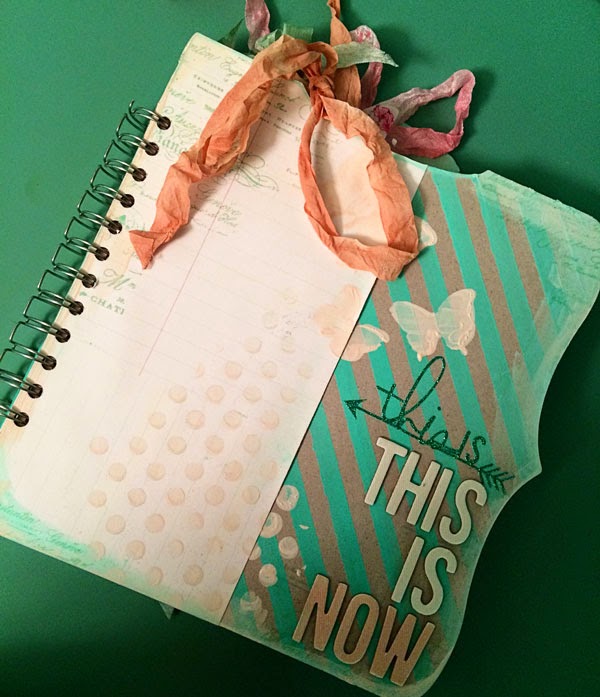
I've been excited about working with the Dreamy collection by Heidi Swapp for some time.  I just had a lot of other projects to finish up but I'd tried out some of the ephemera and just couldn't wait to get into those papers and memory file kits.  The memory files are in different shapes than past collections but I also wanted to challenge myself to use them in different ways.  So I cut them up and got creative!  Above is the cover where I chose to cut that memory file up into approximately and 8 x 8 inch cover featuring the brush script "life is beautiful."  I used modeling paste with the pin dot stencil to create the slightly raised dots.  A little ephemera and some sequin stars left the cover simple but pretty.

On the inside cover I used the new clear magic medium with a spritz of Mustard color shine to add the octagons via a stencil and some dabbing.  I really like the soft color it created.
I also cut apart the photo stack in the memory file kit and used it in various ways.  Here, the shortest of the stack, makes a great cover intro for a small section about my oldest son. I added some of the dreamy stickers above his name.  You can also see some canvas peeking out below.  That is from the mixed media kit.  I spritzed it with color shine; however, I wouldn't recommend doing that.  While it was easy and looks great, the residue is coming off on other pages of the albums.  Next time, I'll try it with magic medium or paint.
This is just a small part of the yellow "choose happy" memory file that I cut up.  I put both front and back together to add photos of my oldest son and even tucked a funny photo behind a journal card from the Hello Today collection.  I do enjoy how the two mix and match so well together!
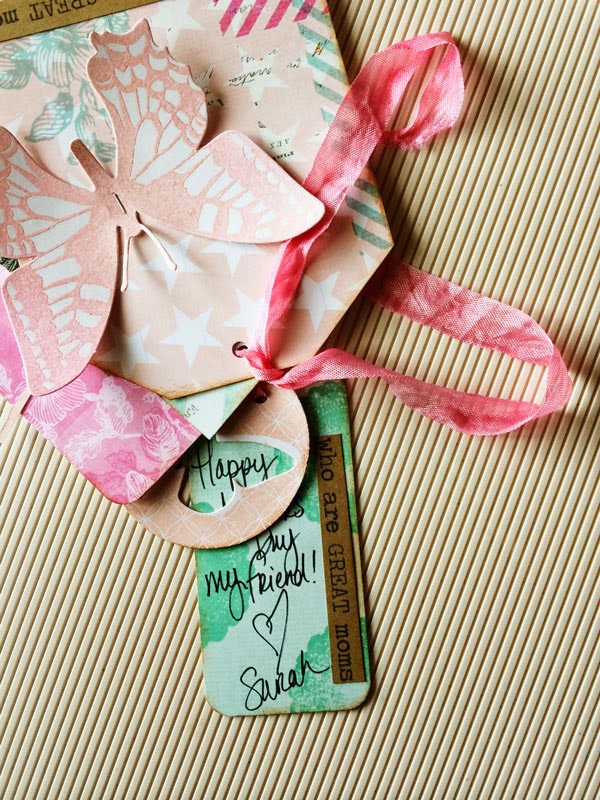
Here I have stitched two pages of the photo stack together along the side, the other being bound by the binding wire, to create a little place to slip a large journaling tag. The tag was created with some of the left over memory file I'd cut.

So I cheated a bit here - I had some left over brown with dot/blue memory file from another project.  I stitched the two sides together and adhered it as a pocket.  I made some large tags and added photos.
Here I added a mini memory file without cutting it up.  I love that ticket design!
Inside I decided to add the remaining photo stack using the same stitching/binding method to hide another big tag.  Love the contrast of these colors!
On the back I wanted to add a journaling card with some thoughts.  My writing is on the back side and I used some washi tape to adhere it to the album.
I needed to put in some pictures of our sweet pup - his personality is as big as the kiddos after all!
Here on the last page I adhered one side of the remaining "choose happy" file folder.
It opens up to include photos of our youngest son.  Again you can see some mixing of the Hello Today with the Dreamy.
I have to admit, I do love this collection.  And I love how this album came together as I challenged myself to think about putting it together differently.  I'll have to do that again!


Welcome!!

Welcome to my new blog!  Here I will share my memory crafting projects, DIY items, and probably a bit about my life and family.  If you want to see some of my prior projects, please check out my previous blog here.